Setting up virtual boxes on Proxmox
In this post I will explain how to import vmdk files (virtual hard disks) into Proxmox VMs. This is necessary, as most of the provider for ready made VMs like https://www.vulnhub.com/ or https://hackmyvm.eu/. Those VMs are mainly maintained / provided by the community which rely on support of people like you and me.
Caution
Make sure you take all necessary precautions when dealing with intentionally vulnerable VMs and generally untrusted hosts. Put them in an isolated network and prevent them from communicating with other devices by appropriate isolation through firewall rules.
Generally, the process can be broken down into the following steps:
- Download VM from source
- Extracting
vmdkfile from VM - Creating VM in Proxmox
- Importing
vmdkdisk into PVE VM - Changing boot order to boot from imported disk
Download from HackmyVM
I prefer anonymity over any registration on some websites. This in mind, I will demonstrate a anonymous way of downloading VMs from HackMyVM.
Navigate to https://hackmyvm.eu/ and use the “Anonymous” button on the top right

On the following page, you are present with a list of new VMs added to the website. To get all VMs, click on “RSS” right below the list:
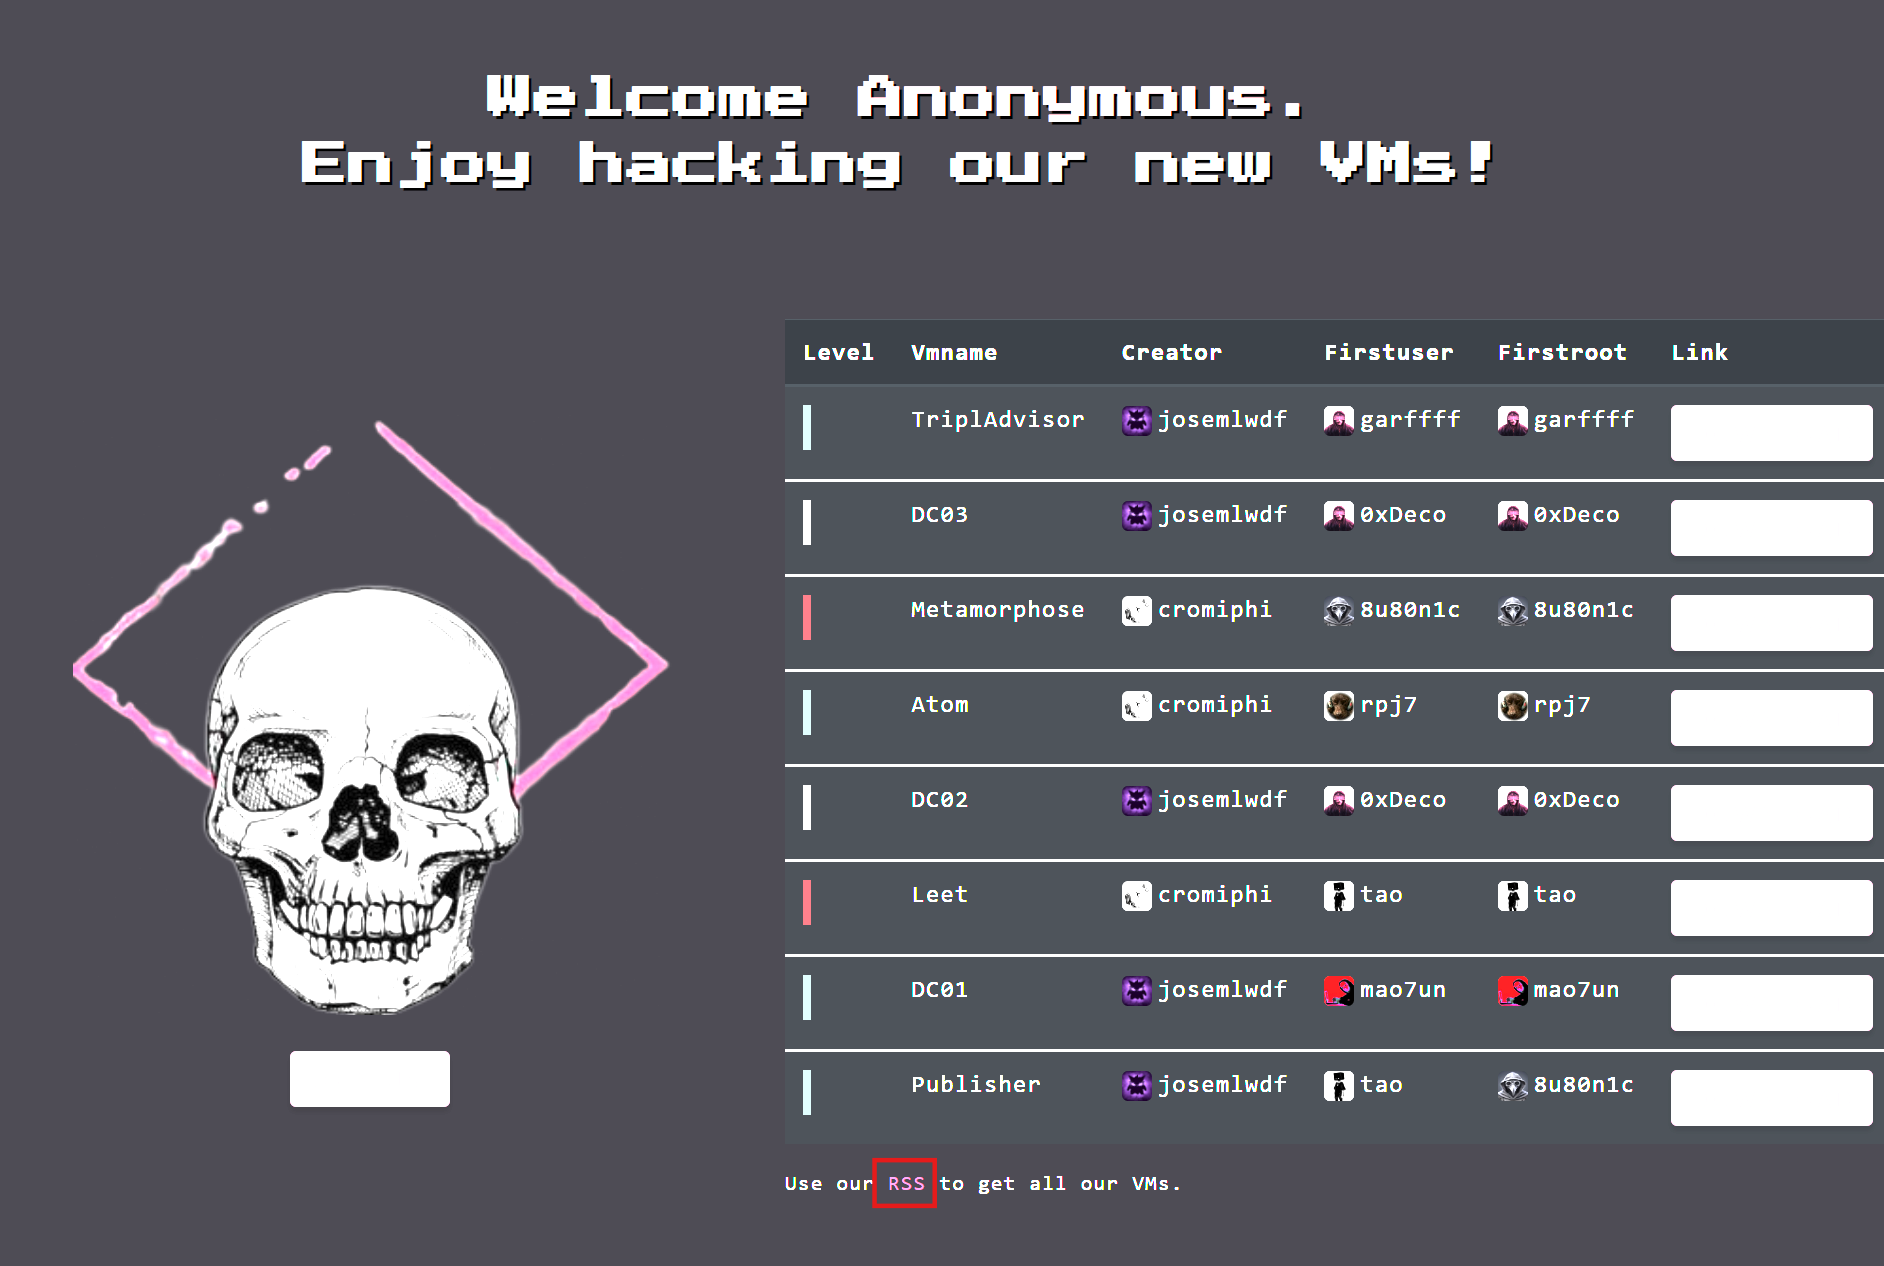
There you get all VMs via there RSS. Alternatively, you can go directly to: https://hackmyvm.eu/rss.xml

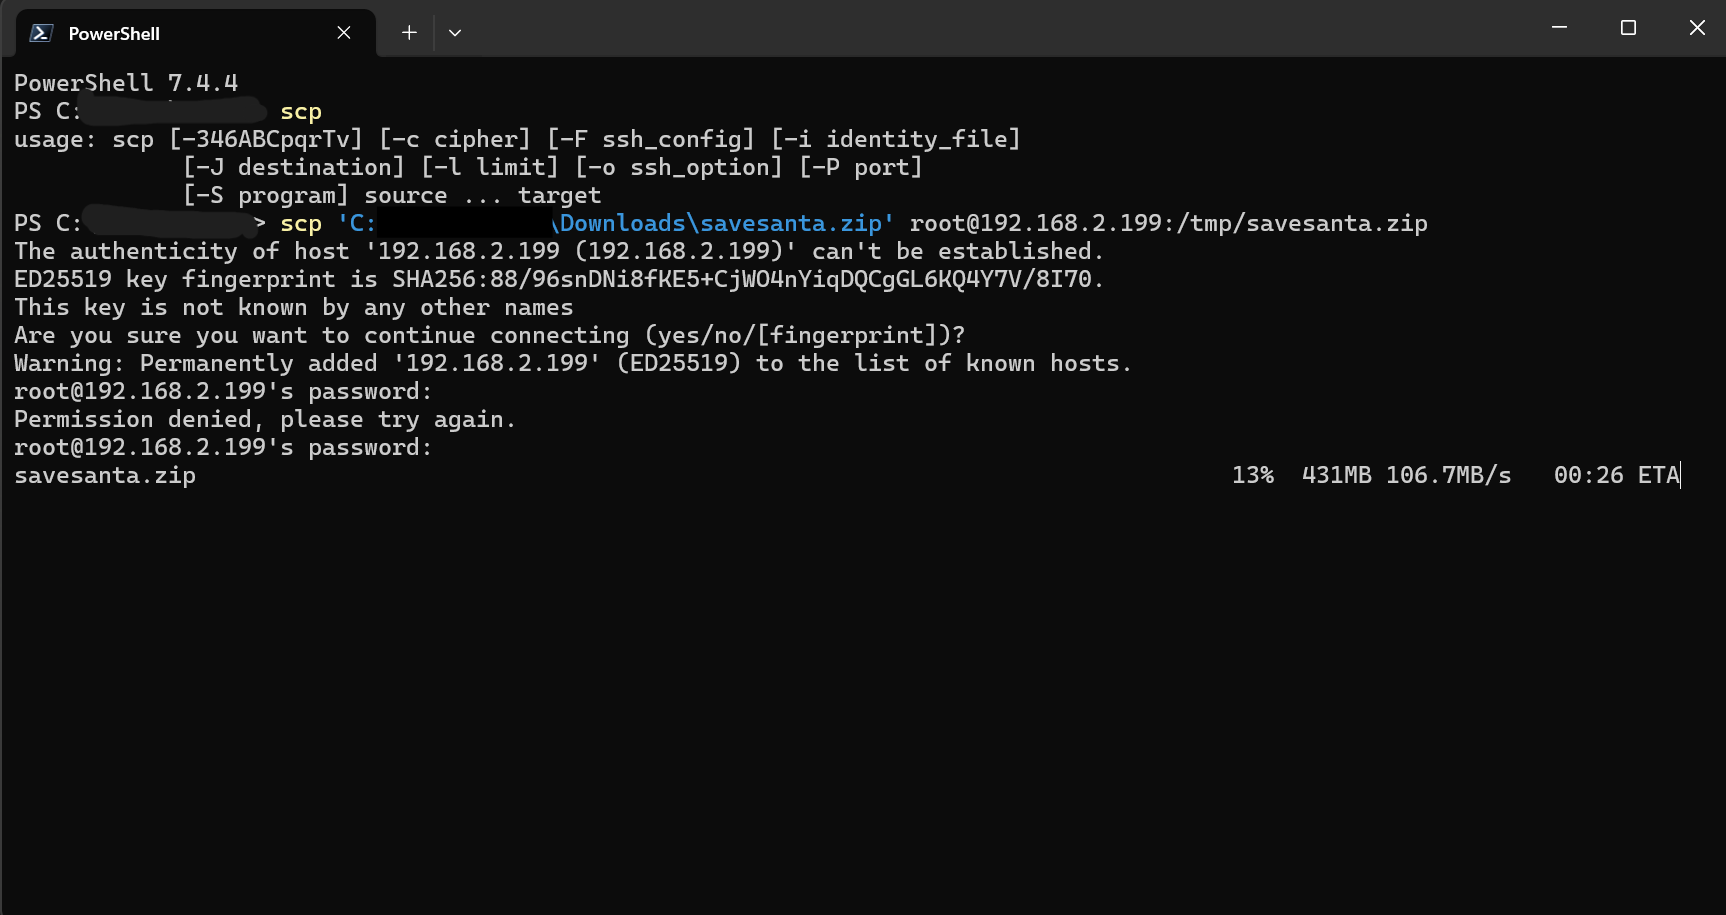
To download one of the VMs, navigate to the download link and start the download via the “Download” Button. HackMyVM is using Mega.nz to manage their file downloads. In my case, I downloaded the files to my Windows host machine running WSL. I have mounted parts of my Windows file system in my WSL instance which I use to transfer the files to my Proxmox host. This could also easily be done directly with PowerShell on Windows.
The next step is to copy it via [[SCP]] to the Proxmox host. SCP is available for Windows as well as Linux and MacOS
Extracting the VM
Open a shell on the Proxmox host and navigate to the destination of our [[SCP]] transfer to confirm that the file was transferred successfully.
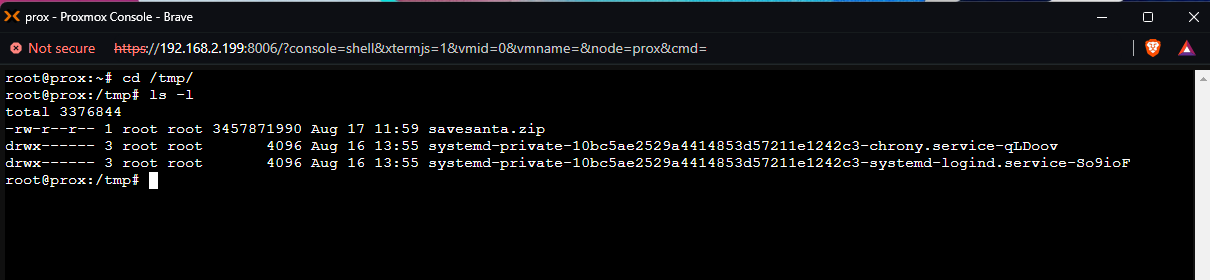 File is there
Now we need to unzip the zip-file first. For this we install [[unzip]]
1
2
3
4
5
6
# check if unzip is installed
which unzip


# If not, install unzip
apt update && apt install unzip -y
Unzipping the first layer
1
2
3
4
5
# Navigate to /tmp
cd /tmp

# Unzip the santasave.zip file
unzip savesanta.zip
The result should be a ova file which is basically a compressed package of all necessary files for a virtual machine. For more information see: https://docs.vmware.com/en/VMware-vSphere/7.0/com.vmware.vsphere.vm_admin.doc/GUID-AE61948B-C2EE-436E-BAFB-3C7209088552.html

The next step is to unpack the ova file to get to the vmdk disk which we need to upload to our Proxmox VM. To extract the ova we can use [[tar]] on our host
1
tar -xvf savesanta.ova
The extract should consist of multiple files including our desired vmdk like:
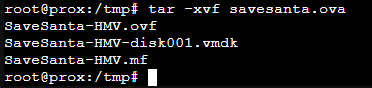 There it is!
Before we can start setting up the Proxmox VM, we need to now, characteristics are appropriate for your VM. The ovf-File contains the relevant information. We can extract all of it with the following [[grep]] command.
1
grep --color -iE 'disk|ram|cpu|size|quantity|ostype' SaveSanta-HMV.ovf
In this case the result is 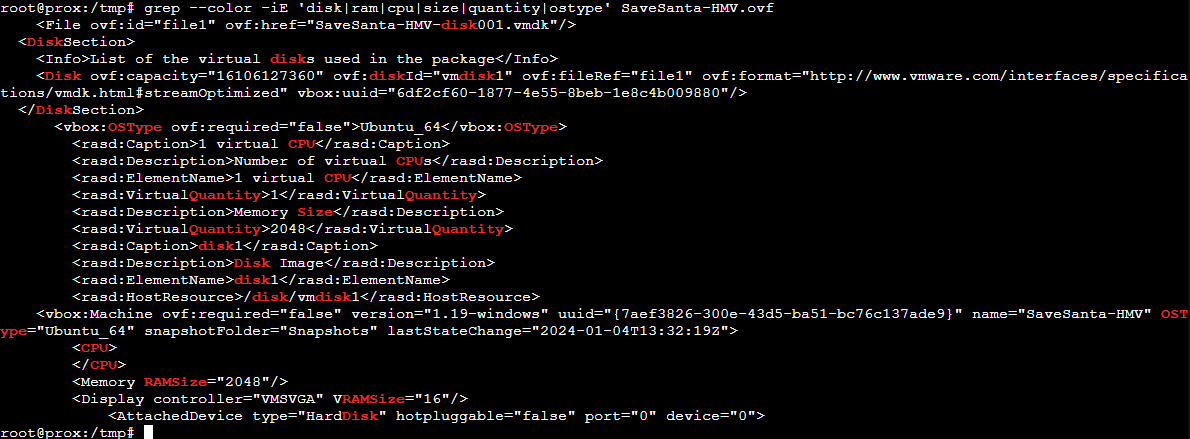
This mean, we need to setup a VM with the following properties: OS: Ubuntu 64 bit Disks: 1 Disk with 16106127360 ~ 116 GB (alot) RAM: 2048 CPU: 1 Core
Create Proxmox VM
So, let’s create the VM in Proxmox via shell
1
2
3
4
5
6
7
8
9
10
11
12
13
14
15
16
17
18
19
20
# Explanations
#
# --name "[Name of VM]"
# --net0 model=virtio,bridge=vmbr1,firewall=0,tag=99
	# net0 is the first network interface
	# model=virtio represents the driver to use
	# bridge=vmbr1, is my lab bridge behind opnsense
	# firewall=0 disables the proxmox firewall
	# tag=99 is the relevant VLAN tag for my isolated VLAN
# --memory 2048 translates to 2048 MiB of RAM
# --cores 2 provides 2 cores to the VM (1 seems to me a little low)
# --vga type=std,memory=16 uses the standard adapter and provides 16 MB
# --ostype l26 is the Linux kernel 2.6
# --storage defines which storage is the disk storage for the VM

VM_ID='992'
qm create "$VM_ID" --name "HMV-SaveSanta" \
--net0 model=virtio,bridge=vmbr1,firewall=0,tag=99 \
--memory 2048 --cores 1 --vga type=std,memory=16 \
--ostype l26 --storage local-lvm
The disk must now be importet to the newly created VM
1
2
3
4
5
# Ensure you are on the right dir
cd /tmp

# Import disk to local-lvm and format in qcow2, not yet attached
qm importdisk "$VM_ID" SaveSanta-HMV-disk001.vmdk local-lvm
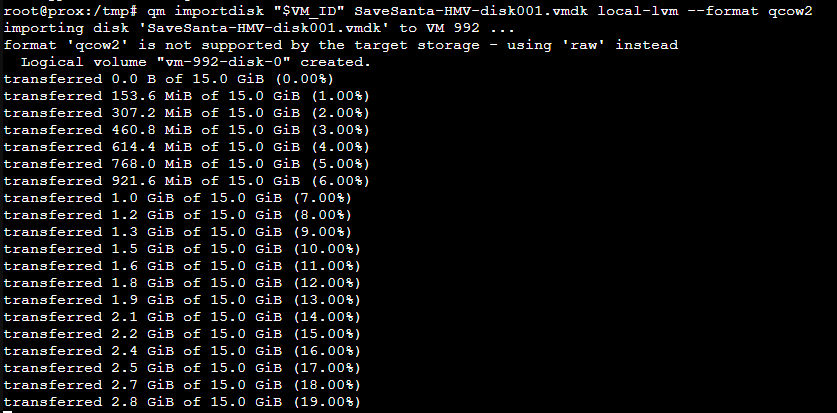 note the issue with the qcow2 format not supported by the target storage (all others are also raw format)

Finally we attach the disk to the controller of the VM and change the boot order to boot from disk
1
2
3
4
5
6
7
# Attach disk using the output of the previous step (vm-992-disk-0)

qm set "$VM_ID" --sata0 "local-lvm:vm-${VM_ID}-disk-0"

# setting the boot order right
qm set "$VM_ID" --boot="order=sata0"

Now we can start the VM and see if everything is running smoothly
1
qm start "$VM_ID"
Looks good: 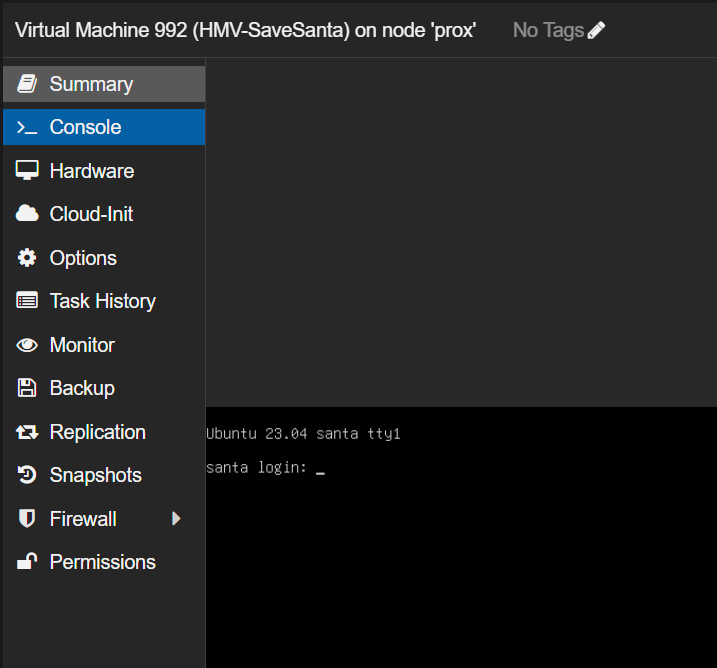
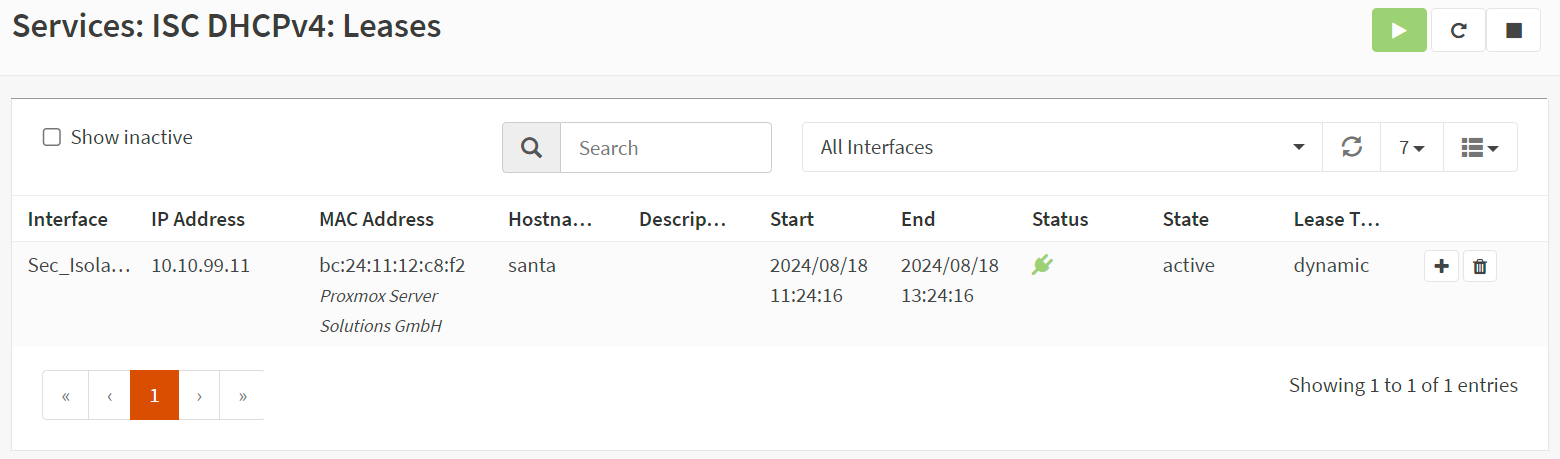
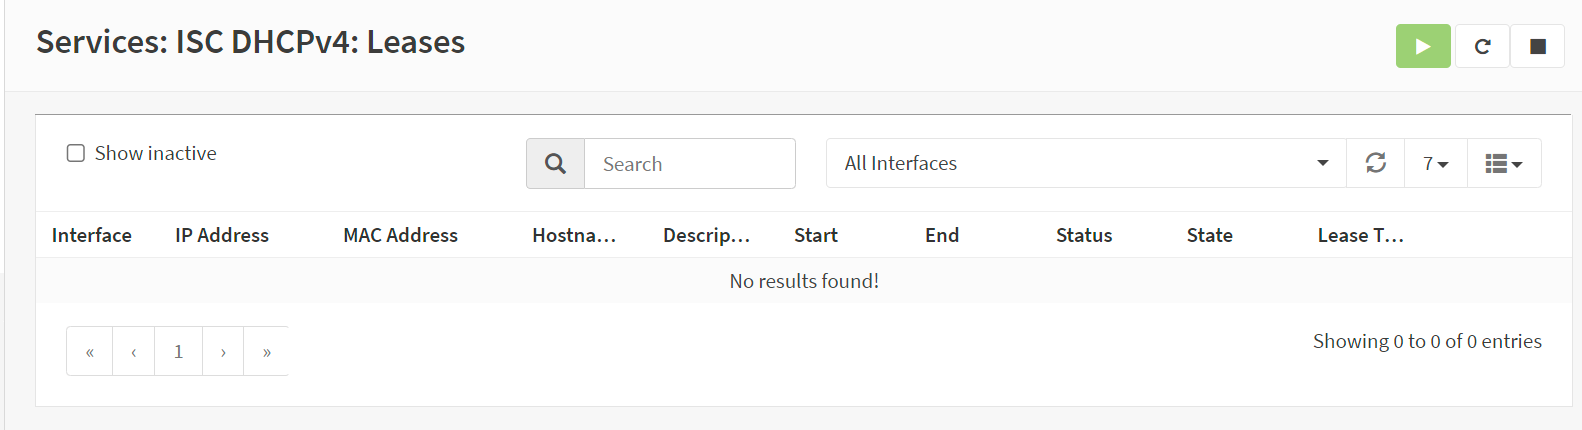
Lets see if an IP was obtained via DHCP as the interface is running DHCP.
Solving DHCP Issue with imported VMs
Some VMs don’t receive leases via DHCP on the connected interface, despite having everything setup correctly.
Thanks to 0xBen Troubleshooting Guide, we know how to fix this. I will directly follow his Guide here using my own homelab. Please visit 0xBen’s Website for a ton of great tutorials, How-To’s and walksthroughts. Personally, everything I build in my homelab was orginally inspired by his work.
Situation:
The VM booted fine and all network related settings are as they should but the VM itself cannot be found on the network. Also the Router does not hold any lease record for the VM.
As 0xBen describes in his blog post, the likely cause is a NIC Driver mismatch caused by a different set of NIC used by the original box creator and our ProxMox VM. Due to Predictable Network Interface Namse, the way Linux kernels attempts the network interfaces. In short, the naming scheme for interfaces changed to use the a combination/set of of firmware, topology, and location information of the NIC to assign it a proper name. This results in names like: enp2s0 instead of the “classic” naming eth0 which causes troubles and has negative security implications.
When we are now loading a VM with it’s original, inherit NIC configuration based on the originial setup, does not match to our new network interface name of the ProxMox VM.
For more information see: https://www.freedesktop.org/wiki/Software/systemd/PredictableNetworkInterfaceNames/?ref=benheater.com
Fixing the NIC issue on our VM
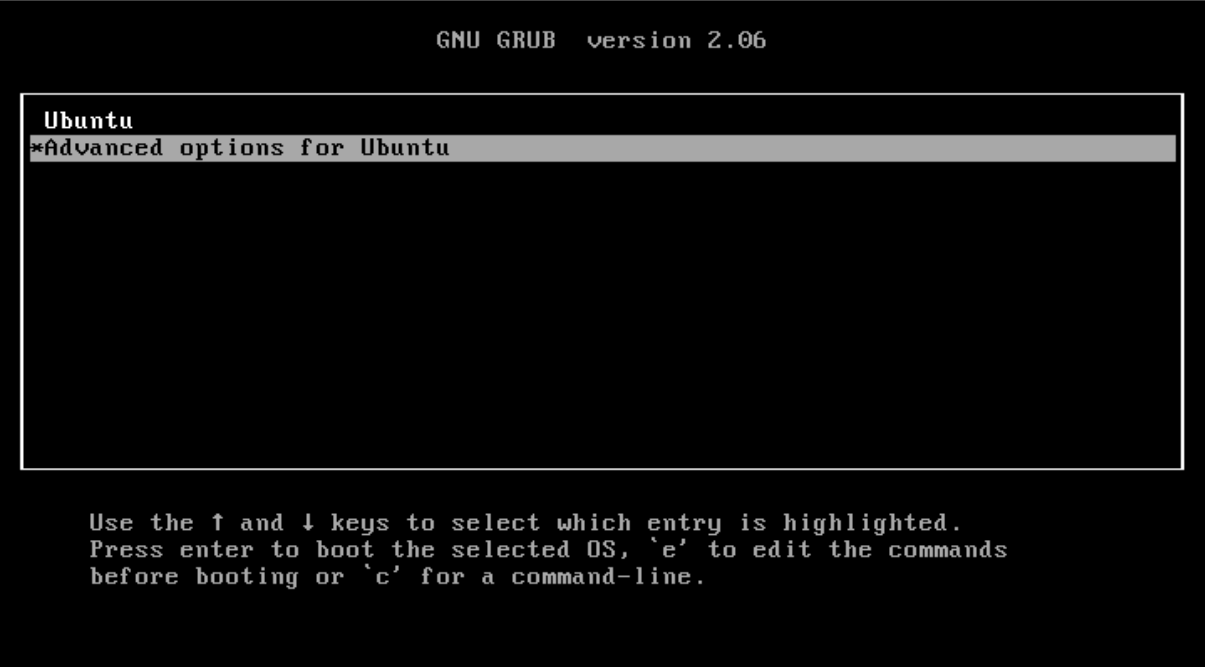
Booting in Single-User Mode
Reboot and press Shift during the boot process. This will open up the grub boot menu and we can use e to open and edit the boot commands.
Our goal is to enable the file system being mounted as read-write and starting with /bin/bash 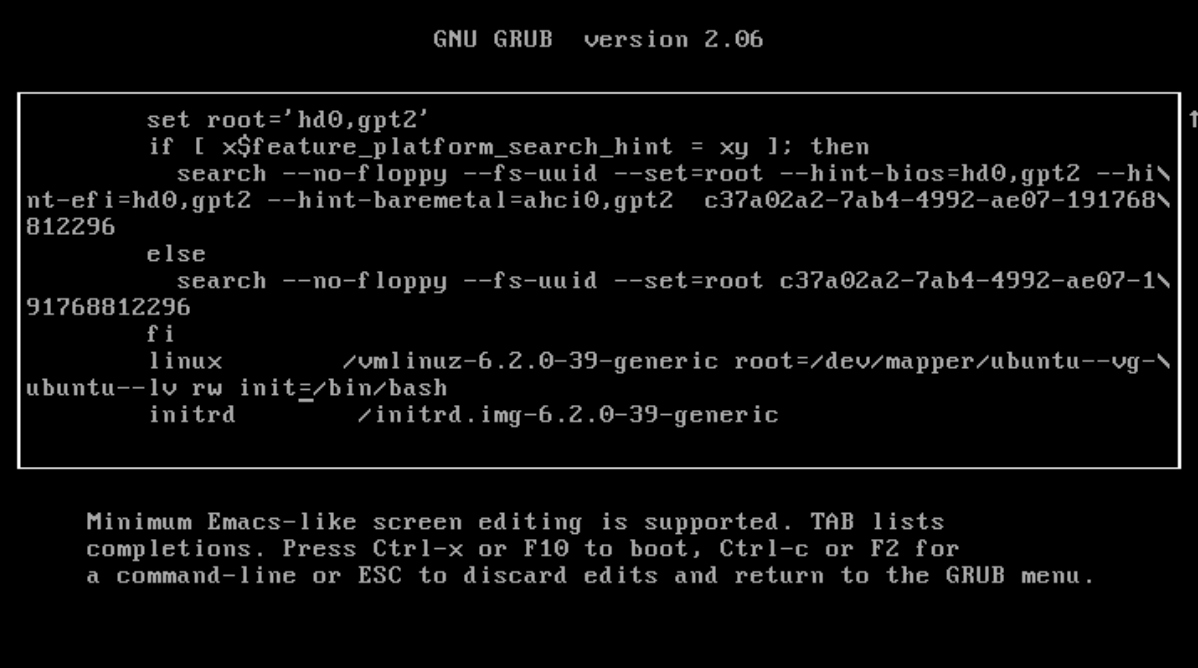
After editing, press F10 or CTRL+X to go on with the boot. The system will boot in Single-User Mode with bash

Adjust Network Interfaces
Get the VM config
First we need to see, what the current configuration is. Depending on the system type, the configuration can be found here:
Debian: /etc/network/interface Ubuntu: /etc/netplan/{something here}
As my system is a Ubuntu VM, I can find my definition here
1
cat /etc/netplan/00-installer-config.yaml

The result is: 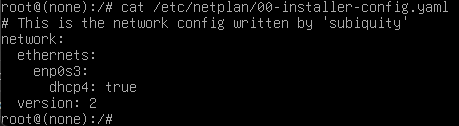
This means, the last network configuration with which the VM was exported had an interface named enp0s3.
Get the underlying VM definition (reality)
Obtain the interface names by ip link on the VM 
Here the distinction becomes clear. The original config contains enp0s3 while the current machine has and interface named ens18
We can now adjust the config to match our “new” ProxMox VM NIC name.
1
2
3
# Open the network config in nano-editor to edit
nano /etc/netplan/00-installer-config.yaml
Replace the enp0s3 with ens18, press CTRL+X to save, confirm with Y and confirm the filename with ENTER .
OLD: 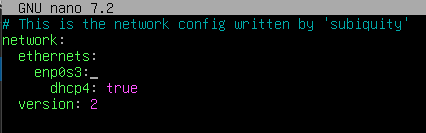
NEW: 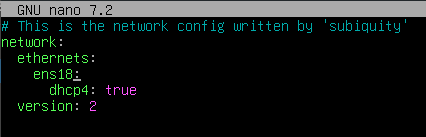
Reboot
run exec /sbin/init to reboot out of the prompt. After reboot, check the DHCP server for new leases being distributed to the VM.
Here it is: